While visiting our daughter recently I was admiring her pretty Valentine wreath she made for her front door. She said, "Oh! Mom I will be happy to make one for you too if you would like." Well! That did my heart good that she would be so thoughtful, especially considering she has four boys and has four very different and very busy schedules.
Below is the wreath I was admiring that my daughter made a couple of days ago for her front door.
She and I met at Hobby Lobby the next day and chose the supplies for the wreath she would be making for me. We chose:
16 inch grapevine wreath to begin the project.
A roll of the red wide deco mesh ribbon.
Pink smaller width deco mesh ribbon.
Red and white hearts garland,
Four - 2 1/2 inch white and red hearts (she found these hearts previously at Walmart.)
Two different pattern fabric ribbons, (1 & 1/2 wide and 1/2 wide)
Pipe cleaners cut in thirds.
6 inch wooden letter for the center of the wreath.
She already had the paint, spray glue and glitter she needed for the letter.
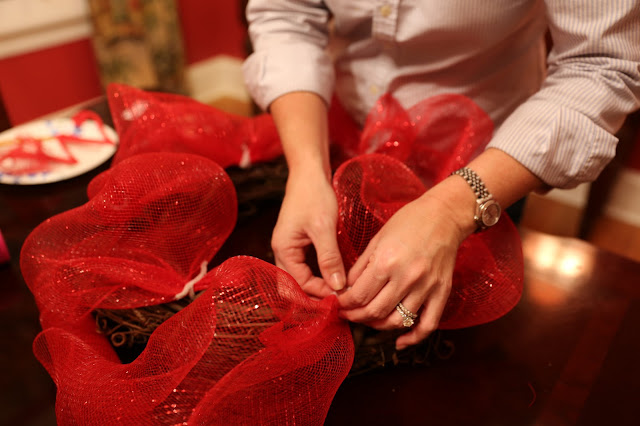
She unrolled the large red roll and began to place it on the grapevine wreath.
She used pipe cleaners cut in thirds to attach. She would have preferred using red, but had white on hand already.
She continued placing the ribbon on around the wreath attaching at intervals with pipe cleaner.
As you can see she puffed the ribbon into place attaching at even intervals around the wreath.
Now she is attaching the more narrow pink ribbon. She attached at same intervals as with the red ribbon.
She used the same pipe cleaner segments as she used with the red to attach the pink ribbon.
She cautioned about getting too serious....she said, "Just get it on there!"
As you can see she intertwined the pink ribbon in different directions around the red ribbon.
Then she placed two different patterned ribbons over the pipe cleaner sections and tied them in the middle over the pipe cleaner sections. One ribbon about an inch and a half wide and the other about a half inch wide. The wider ribbon was cut about 8 inches long and the more narrow ribbon cut about 7 inches long.
Then she took the hearts garland and wrapped the garland in a decorative pattern around the wreath.
She placed a little glue-gun glue on the back of the hearts and placed them on the fabric of the wreath.
She said the hearts will take a little time for the glue to dry on the fabric.
She used a spray adhesive on the wood letter.
Then she sprinkled a little glitter on the top of the spray adhesive.
She already had the spray adhesive and glitter from previous projects. Oh! yes, I forgot, we painted the letter with a white craft paint just before she started placing the ribbon on the wreath. It dried very quickly and then she sprayed it with the adhesive and sprinkled with the glitter. When the glue and glitter dried she then placed the letter on the wreath intertwined with the hearts garland.
Craft supplies are available in many different places.....we just happen to like Hobby Lobby because it is closer to our homes then other craft stores.
While we were checking out with out supplies my daughter shared with me you can download an app on your iPhone or iPad and get a 40% off coupon to use on any one item you are purchasing. She showed the coupon to the cashier from her iPhone. We used the 40% discount on the larger deco mesh ribbon and saved about $4.00
This is the app site: https://itunes.apple.com/us/app/hobby-lobby/id535562583?mt=8
This is the finished wreath hanging on the inside door at my daughter's home.
This project takes about 45 minutes from beginning to end.
This project takes about 45 minutes from beginning to end.
The next morning I hung the wreath outside on our front porch screen door.
I think the wreath is so colorful and festive looking.
But most especially of all I have a warm spot in my heart knowing my sweet daughter took the time and effort to make this pretty wreath for us.
We figured the final cost of making this wreath and give or take a few cents the cost was right at about $22.00. That does not include the paint, spray adhesive and the glitter she already had from previous projects. We felt we saved a good bit .... If we bought a similar wreath at a florist, it would probably be a good bit more. But, to me it is priceless!
Thanks so much for joining us through the steps of making this pretty Valentine wreath. I do hope you are doing well wherever you may be and that you have a wonderful weekend.


No comments:
Post a Comment